

Jekyll Themes on GitHub Pages is a static and free site generator has become incredibly popular for developers and content creators who want a seamless and efficient way to build websites.Jekyll Themes on GitHub Pages offers a free hosting service with robust version control. One of the best ways to enhance your Jekyll site is by installing Jekyll Themes on GitHub Pages. This guide will walk you through the process of installing Jekyll Themes on GitHub Pages particularly when using Jekyll Themes on GitHub Pages and provide some tips to make your website stand out. See more informative blog
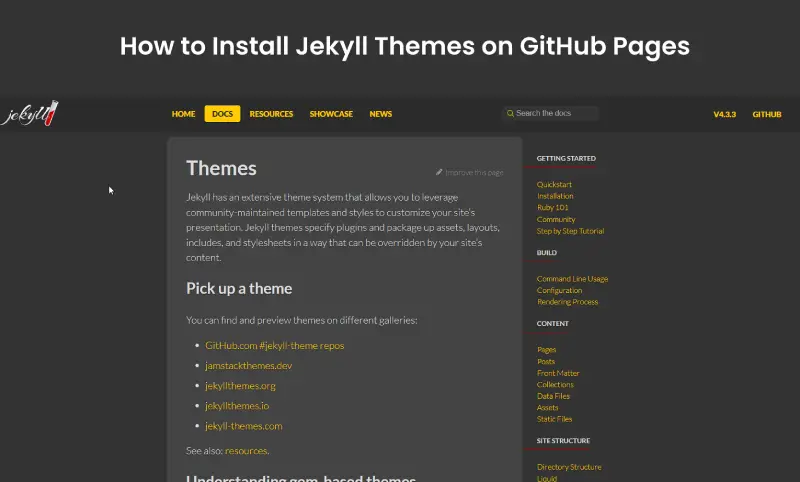
What is Jekyll Themes?
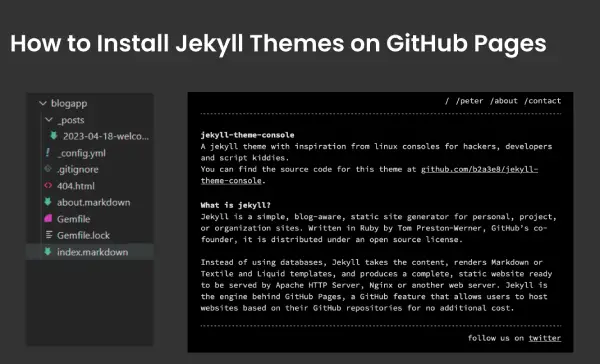
Jekyll themes is a static site generator designed for building blogs project sites and other static websites. It takes your content, written in Markdown or Textile, and converts it into a complete static website. Jekyll uses the Liquid templating language to process layouts and includes, making it a powerful tool for developers who prefer working with code over a traditional CMS (Content Management System). See Jekyll Resource
Table of Contents
Why to Use Jekyll Themes on GitHub Pages?
If you decide to use a Jekyll theme it will introduce a number of simplifications in tuning up your site. As themes, they arrive fully developed to have their layout, style and even functionality, freeing you to work on your content. Here are some reasons to use Jekyll Themes on GitHub Pages:
User-Friendly Setup: When working with Jekyll Themes under GitHub Pages, creating of a website is not a problem. Customizations within Jekyll Themes on GitHub Pages is easy and uncomplicated, specifically for newcomers into Jekyll building services.
Customizability: The default of Jekyll is simplistic in design but well optimized and overall the themes are customizable with multiple skins. If you’re looking for a simple blog, a professional portfolio, or a business website, there is always a theme for you.
Performance Optimization: Web sites that are made with Jekyll Themes on GitHub Pages are fast and secure by default. Believing the fact that static sites take shorter time to load than dynamic ones improves user experience and low bounce rates.
SEO Advantages: GitHub Jekyll Themes have been developed and created while keeping in mind SEO friendly and optimized website designs. Using semantic code and having a short loading time of the webpage helps websites rank better on the search engines allowing more people to find your website.
Installation Precondition:
Make sure you have the following before you begin: Jekyll Themes on GitHub Pages
Git: GitHub and Git are used with version control and deploying your website to use the GitHub Pages feature.
Ruby and RubyGems: If you build Jekyll with Ruby being used, it is necessary to have Ruby on your machine.
Jekyll: You do have to have Jekyll installed. You can install it using RubyGems with the command: gem install jekyll bundler.
GitHub Account: You need to bring your own device and have a GitHub account if you do not have one, create one.
How to Install a Jekyll Themes on GitHub Pages
Explore a list of Jekyll Themes on GitHub Pages based on multipurpose, responsive, and customizable themes that are available on GitHub Pages for free to improve your static blog or site. Get built-in integration along with free web publishing through GitHub Pages.
1) Create a New Jekyll Site
First, you have to build a new minimal Jekyll website. To be able to do that, you will need to follow the following steps: Open your terminal and run the following command:
jekyll new my-awesome-site
cd my-awesome-site
This command will install the Jekyll gem along with the default files/folders and create a new directory for your site called my-awesome-site.
2) Choose a Jekyll Theme
There are hundreds of Jekyll themes on GitHub Pages that people can use on their websites. You can easily look them up on various sites, like, for instance, Jekyll Themes or even directly on GitHub. To illustrate for this guide, we will be using a premium theme known as “Minimal Mistakes.”.
3) Add the Theme to Your Gemfile
The first one will take you to your Jekyll site directory, and the second will open the Gemfile using a text editor. To incorporate the concept of “Minimal Mistakes,” add the following line:
gem "minimal-mistakes-jekyll"4) Configure the Theme
The last thing that is needed is to set up your site to use the new theme for that purpose. Open _config.yml and update the theme line:
theme: minimal-mistakes-jekyll5) Install the Theme
Run the following command in your terminal to install the theme and its dependencies:
bundle install6) Customize Your Site
The Minimal Mistakes theme for bloggers, like any other, has a number of options for customization. Many of these options can be changed in the _config.yml file. For example, you can change the web title and description, social links, and much more. Here’s a basic example:
title: My Awesome Site
description: >- # this means to ignore new lines until "baseurl:"
  Welcome to my awesome site built with Jekyll and Minimal Mistakes theme.
baseurl: "" # the sub-path of your site, e.g. /blog
url: "https://yourusername.github.io" # the base hostname & protocol for your site

author:
  name: Your Name
  email: your-email@example.com
  # Add more author information here
Deploy to Jekyll Themes on GitHub Pages
You have successfully configured and personalized the site you will now push it to Jekyll Themes on GitHub Pages.
1) Initialize a Git Repository
If you haven’t already, initialize a git repository in your site directory and commit your changes:
git init
git add .
git commit -m "Initial commit"
2) Create a GitHub Repository
Visit Github and follow the prompts to create a new repository with the name yourusername.github.io replacing your actual username. This is important because GitHub Pages will then use this repository to publish your site.
3) Push Your Site to GitHub
Add your GitHub repository as a remote and push your local repository to GitHub:
git remote add origin https://github.com/yourusername/yourusername.github.io.git
git branch -M main
git push -u origin main
In case you’re using GitHub, you don’t need to worry about the process of building and deploying your Jekyll site because GitHub will do it for you. Your site should now be live at https://yourusername.github.io.
How to Build Your Jekyll Theme
If you are aspiring to design an elegant website, there is no better place than using Jekyll themes in GitHub Pages. These themes do not only make the process of creating a new website much easier and quicker but also guarantee that the site you create will be professionally designed and optimized. In this guide, you’ll learn about the top Jekyll themes for GitHub Pages and how they can level up your web presence.
1) Modify Layouts
In Jekyll theme structures, the _layouts folder helps you determine the structure of your web page. These layouts can be altered to suit the general theme or appearance of your site if you want to. For example, to change the layout of the application, you can edit the default.html file.
2) Customize Includes
The _includes folder is used as a directory for creating partial templates that can be used throughout your site. These are typically files that can be adjusted in the way of elements such as headers, buttons, and nav bars.
3) Adjust Styles
Examples of themes include an assets/css folder that contains style sheets. To change the look of your site, you may modify these CSS files. However, there is also an option to set your own custom styles in a new CSS file and specify it in _config.yml.
4) Use Plugins
Jekyll is compatible with different types of plugins to further augment your site. For instance, there are plugins for SEO, sitemaps, or image optimization. There are a number of plugins to use that you need to add to your Gemfile and _config.yml files, respectively.
# Gemfile
gem "jekyll-seo-tag"
# _config.yml
plugins:
- jekyll-seo-tag5. Update Content
Content page is stored in _posts directory for blog pages and other directories like _pages for the static page. You can now write and format your content in plain text and or using Markdown / HTML.
6. Add Widgets and Scripts
You can make your site better by having widgets and scripts added onto the site. For instance, if you need to track the traffic on your site, you can set a google analytics tracking code on head html include file.
Common Problems and Their Solutions
Explore how Jekyll Themes works on GitHub Pages and find out that integration and customization options are virtually limitless. No matter if you’re a professional coder or a total newcomer to themes and templates, using Jekyll themes is an ideal way of getting a beautiful, high-quality website up and running.
1) Theme Not Applied
If your theme changes are not reflected, ensure that:
- The theme is properly set under the _config.yml file.
- You have executed the command bundle install to get the theme installed.
- The current Jekyll build is set for changes on your local server using the command (bundle exec jekyll serve).
2) GitHub Pages Build Errors
If GitHub Pages does not build your site, click on the link located in the repository settings under the GitHub Pages tab to view the build logs. Common issues include:
- Missing dependencies: Make certain to mention all necessary gems in the Gemfile.
- Invalid configuration: To make a confirmation, the reader is advised to look for syntax errors in the _config.yml file.
3) Custom Domain Issues
If you’re using a custom domain, ensure your DNS settings are correct and that the custom domain is specified in _config.yml:
url: "https://www.anycustomdomain.com"Also, there must be a CNAME file in the root directory for your own domain as well.
Conclusion
As it was demonstrated, the installation of Jekyll and setup of GitHub Pages is not difficult, and choosing an appropriate theme will add an aesthetic boost to your webpage. Hopefully, following this guide should help you create your perfect Jekyll site with a professional theme for your project and deploy it nicely to GitHub Pages.
Jekyll and GitHub Pages are flexible and free to use to build a personal blog or project portfolio and business site. Happy coding.