

Here we will teach you the process of building divi carousel layout or section without using any plugins. This create divi carousel layout tutorial does not need any plugin purchase while simultaneously preventing slowdowns on your landing page and website. The ability to design carousel layouts in Divi using built-in tools stands as an effective method to implement sliders without sacrificing site performance. The lack of a built-in carousel module in Divi allows you to implement this effect using custom HTML and CSS along with JavaScript. The solution requires Divi modules to design content structure while CSS elements enable smooth transitions and JavaScript adds functional components to build an elegant functional carousel layout. The method leads to flexible performance improvements alongside full design and behavioral control of the carousel system.
BONUS: You can buy a Premium Divi Carousel Layout Pack when you’ll submit A Quote at our website. Buy A Divi Carousel Layout
What do You create Divi Carousel Slider without Any Plugin?
The Divi carousel represents an enhanced slider technology which shows various content from multiple slides automatically moving between active sets of images. A create Divi carousel layout offers a realistic 3D perspective and enables the display of any carousel set’s preceding and subsequent slides over standard Divi slider modules.
A Create Divi carousel differs from a Divi slider through its capability to show multiple slides simultaneously rather than the single view of the slider.
Table of Contents
How to Create Divi Carousel Section without any plugin?
The First Move to Implement Slick Slider on Divi Landing Pages starts with creating a divi carousel layout for team members. Multiple procedures lead to obtaining the carousel feature.
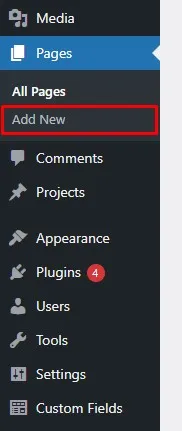
Step 1: Create A New Page and Enable Visual Builder
Successful utilization of the divi website requires users to generate pages prior to enabling visual builder on their site. A help line is available in case you have any further requirements.
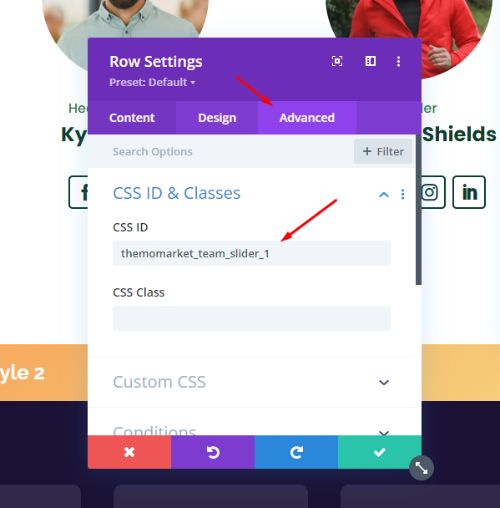
Step 2: Create A Row on Your Exiting Page.
Not so hard, right? There is nothing to fear. You should start by creating a section that contains a row with an ID designated as [themomarket_team_slider_1].
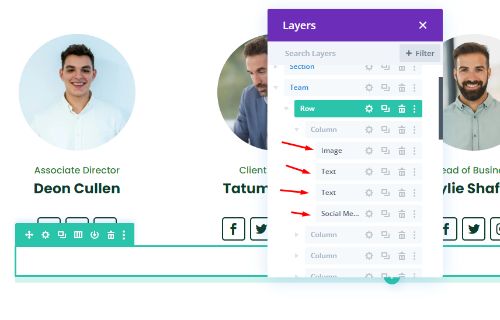
Step 3: Add Some Module Between Columns.
Establish modules that connect individual columns in the system. 1. Image module, 2. Text Module, 3. Text module 4. Social media follow module. Design them your way. Initiating from my design you duplicate and replicate a column five times to reach the total of five.
Step 4: Add This Code in Your Code Module.
User should position a new row at different sections of their landing page before setting up the code module component within that page. The row should have just one column before adding CSS and JavaScript code. Through the jQuery plugin I implemented into the carousel. View the jquery slick slider plugin.
<link rel="stylesheet" href="https://cdnjs.cloudflare.com/ajax/libs/slick-carousel/1.9.0/slick.css"/>
<style>
.slick-slider {
    overflow: hidden;
}
.slick-list {
    margin: 0 -24px;
}
.slick-slide{
    padding: 0 24px;
    margin:0!important;
}
  .slick-arrow {
    cursor: pointer;
    color: transparent;
    background: transparent;
    position: absolute;
    top: 50%;
    margin-top: 0px;
    opacity: 0;
    visibility: hidden;
    transition: all 500ms ease;
    z-index:10;
}
  #themomarket_team_slider_1 .slick-prev {
    left: 0px;
    width: 0;
    height: 0;
    border-left: 0 solid transparent;
    border-right: 25px solid #0b3d2c;
    border-top: 20px solid transparent;
    border-bottom: 20px solid transparent;
}
  #themomarket_team_slider_1 .slick-next {
    right: 0px;
    width: 0;
    height: 0;
    border-right: 0 solid transparent;
    border-left: 25px solid #0b3d2c;
    border-top: 20px solid transparent;
    border-bottom: 20px solid transparent;
}
#themomarket_team_slider_1:hover .slick-arrow {
    opacity: 1;
    visibility: visible;
    margin-top: -15px;
}
  #themomarket_team_1 .et_pb_image_wrap .box-shadow-overlay{
    border-radius:100%;
    transition: all 600ms ease-in;
    border:4px solid transparent;
  }
  #themomarket_team_slider_1 #themomarket_team_1.slick-center .et_pb_image_wrap .box-shadow-overlay,
  #themomarket_team_1:hover .et_pb_image_wrap .box-shadow-overlay{
    box-shadow:inset 0px 0px 0px 20px #ffffff;
      border:4px solid #0b3d2c;
  }
</style>
<script>
(function($) {
   var $jq = jQuery.noConflict();
    $jq(document).ready(function() {
        $('#themomarket_team_slider_1').slick({
        dots: false,
        arrow:true,
        autoplay: true,
        autoplaySpeed: 1000,
        infinite: true,
        speed: 1000,
        centerMode: true,
        centerPadding: '0',
        slidesToShow: 3,
        slidesToScroll: 3,
        responsive: [
          {
            breakpoint: 1024,
            settings: {
              slidesToShow: 2,
              slidesToScroll: 2,
            }
          },
          {
            breakpoint: 600,
            settings: {
              slidesToShow: 1,
              slidesToScroll: 1
            }
          }
        ]
      });
    });
})(jQuery);
</script>
<script src="https://cdnjs.cloudflare.com/ajax/libs/slick-carousel/1.9.0/slick.min.js"></script>
Step 5: Save Your Page And Test Your Slider.
The saving process completes the work and ends the operation. My Divi Carousel layout design should be visible through Divi Carousel Section one.
Table of Steps: Divi Carousel Layout using Slick Slider
| Step | Description | Code/Action Required |
|---|---|---|
| 1. Include Slick Slider | Add the Slick Slider JavaScript files together with CSS to your Divi framework. | Add this to Divi → Theme Options → Integration <head>: html <link rel="stylesheet" type="text/css" href="https://cdn.jsdelivr.net/npm/slick-carousel/slick/slick.css"/> <link rel="stylesheet" type="text/css" href="https://cdn.jsdelivr.net/npm/slick-carousel/slick/slick-theme.css"/> And add this to <body>: html <script src="https://cdn.jsdelivr.net/npm/slick-carousel/slick/slick.min.js"></script> |
| 2. Create a Carousel Layout Using a Table | Add the HTML structure to a Code Module inside Divi. | html <div class="slick-carousel"> <table> <tr> <td> <div class="carousel-item"> <img src="image1.jpg" alt="Slide 1"> <p>Slide 1 Description</p> </div> </td> <td> <div class="carousel-item"> <img src="image2.jpg" alt="Slide 2"> <p>Slide 2 Description</p> </div> </td> <td> <div class="carousel-item"> <img src="image3.jpg" alt="Slide 3"> <p>Slide 3 Description</p> </div> </td> </tr> </table> </div> |
| 3. Activate Slick Slider | A Code Module needs to be added for launching Slick Slider with specified configuration. | html <script> jQuery(document).ready(function($){ $('.slick-carousel table').slick({ slidesToShow: 2, slidesToScroll: 1, autoplay: true, autoplaySpeed: 2000, arrows: true, dots: true, }); }); </script> |
| 4. Apply CSS for Styling | CSS can modify the visual elements of the carousel. | Add to Divi → Theme Options → Custom CSS: css .slick-carousel table { width: 100%; } .carousel-item { text-align: center; padding: 10px; } .carousel-item img { max-width: 100%; border-radius: 10px; } .slick-prev, .slick-next { background-color: rgba(0, 0, 0, 0.5); border-radius: 50%; } |
| 5. Save & Test | Check the carousel functionality by previewing the page. | Apply your changes in Divi Builder and reload the web page. |
The following table outlines the steps to add Slick Slider to Divi Carousel Layout based on a table organizational structure. Contact me if you require additional changes to the document. 🚀
The page requires help with development support.
Reach out through message and we will build a slider based on Divi theme for you. Opening an account at the Divi official site and purchasing the Divi theme needs to happen before proceeding any further.
The information has been presented to you in summary format. When you find the page satisfying it makes me equally content. I will guide you through your problems if you require further assistance. Thank you so much!
Conclusion
You can achieve full control over your Divi carousel by designing it without plugins while eliminating possible negative impacts from third-party extensions. This guide enables you to create an auto-scrolling carousel that features smooth transitions while offering optional navigation features. A smooth user engagement solution for your Divi website exists through this method which can display testimonials alongside products or portfolio content.