
Certainly! The web development process needs this essential step of converting Figma to Tailwindcss designs to Tailwind CSS vs Bootstrap code. A Figma to Tailwindcss design moves from visual elements through translation to working HTML and CSS code that creates responsive functional websites and web applications. The following guide demonstrates a step-by-step conversion process of designing in Figma while specific examples focus on transitioning designs from Figma to Tailwindcss and Bootstrap. The website content needs additional blogging material. See more blog.
To Convert Figma to Tailwindcss Code:
You must first fully understand the design file structure. To begin converting Figma to Tailwindcss designs you need to grasp the Figma designed contents thoroughly. You need access to the Figma design file with understanding of its structure which comprises layouts components and typography and colors and interactive elements.
Table of Contents
- Study how elements position within the overall page design through an examination of layout as well as examination of grid organization. Study the grid system carefully because you will require it when developing responsive page structures in HTML and CSS. Figma to Tailwindcss
- Studio designers should record all the font styles together with their dimensions and height along with their weight parameters which appear in the design project. The information regarding text elements will help you create accurate styles within your coding elements.
- The design features a set of defined colors which need identification. Record all design color schemes including base and secondary tones and active and hover state effects. Figma to Tailwindcss
- The various components in the design including buttons along with header and footer sections and forms and navigation bars and cards with any custom elements need identification. Record the measurements together with design styles as well as all specified interactions.

Explain Decision Between Using Tailwind CSS and Bootstrap:
Your final decision about HTML conversion depends on project requirements and personal selection between Tailwindcss vs Bootstrap: Figma to Tailwindcss according to your framework understanding and development workflow preferences.
1) Using Tailwindcss for Conversion:
Tailwind CSS has become the top emerging CSS component to enter the market during recent times. Set classes come with Tailwind CSS because they enable users to directly style their HTML elements. The guide outlines the complete process of converting Figma pages to HTML code while implementing Tailwind CSS. Figma to Tailwindcss
Set Up a Project: Your Project Requires Creation of a Fresh HTML File Where Tailwind CSS Framework Comes Together as Its Main Element. Tailwind CSS can be obtained through either downloading the hosted CSS file or using local installation with build capabilities.
HTML Structure: You should build your HTML document structure according to Figma design layout. HTML elements that describe meaning should be used in your design with <header>, <nav> and <main>, <footer> and <section>.
Component Styling: Tailwind CSS utility classes should be assigned to every Figma-design component. You can achieve different visual effects in Tailwind CSS with containers styled using bg-blue-500 combined with text-xl and p-4 features. Tailwind CSS features ready-made utility classes that simplify exact matching of design visual elements. Figma to Tailwindcss
Responsive Design: A reusable design based on flexible layouts will be created through responsive utility classes (such as md:grid and lg:flex) available within Tailwind CSS to support diverse screen sizes. Testing your design through various breakpoint levels will let you check the responsive features.
Typography and Colors: The application implements Tailwind CSS classes to show specified fonts and colors using font-sans together with text-blue-800 and similar elements. Users who work with Tailwind CSS can modify default type settings alongside default color values by adjusting their configuration settings.
Interactive Elements: Interactive elements with minimalistic functions should integrate available Tailwind CSS style classes together with JavaScript implementation to operate. Figma to Tailwindcss
Testing and Refinement: The precision assessment depends on conducting continuous tests between your coded design and Figma design. Maximize the visual file updates by addressing modifications that occur.
Figma to Tailwind CSS Structure:
| Figma Property | Example Value | Tailwind Class | Usage Example |
|---|---|---|---|
| Font Size | 16px | text-base | <p class="text-base">Text</p> |
| Font Weight | Bold | font-bold | <h1 class="font-bold">Title</h1> |
| Text Color | #1E3A8A | text-blue-900 | <span class="text-blue-900">Text</span> |
| Background Color | #E0F2FE | bg-sky-100 | <div class="bg-sky-100">Box</div> |
| Padding (top-bottom) | 16px | py-4 | <div class="py-4">Content</div> |
| Padding (left-right) | 24px | px-6 | <div class="px-6">Content</div> |
| Margin Top | 20px | mt-5 | <div class="mt-5">Section</div> |
| Border Radius | 8px | rounded-md | <img class="rounded-md" src="..." /> |
| Box Shadow | Medium Shadow | shadow-md | <div class="shadow-md">Card</div> |
| Width | 300px | w-[300px] | <div class="w-[300px]">Fixed width</div> |
| Height | 100px | h-[100px] | <div class="h-[100px]">Fixed height</div> |
| Alignment (centered) | Center horizontally | flex justify-center | <div class="flex justify-center">Centered</div> |
| Alignment (centered) | Center vertically | items-center | <div class="flex items-center">Vertically Centered</div> |
| Layout – Column | Vertical Stack | flex flex-col | <div class="flex flex-col gap-4">Stacked Items</div> |
| Layout – Grid | 2 Columns | grid grid-cols-2 | <div class="grid grid-cols-2 gap-4">Grid</div> |
| Responsive Font Size | 16px on Mobile, 24px on Desktop | text-base md:text-xl | <p class="text-base md:text-xl">Text</p> |
| Hover Effect | Hover background change | hover:bg-blue-500 | <button class="hover:bg-blue-500">Hover me</button> |
2) Using Bootstrap for Conversion:
The Bootstrap framework brings front-end development tools including pre-made components with responsive grid elements to aid programmers. Figma design conversion to Bootstrap code needs administrators to follow the specified procedures.
Set Up a Project: Establish a fresh HTML document for your project then integrate both Bootstrap CSS and JavaScript files within it. The files can either be linked through hosted URLs or you have the option to download them for local hosting. Figma to Tailwindcss
HTML Structure: Your HTML framework should begin with designing HTML document structure that follows the Figma layout design. The Bootstrap grid system within the framework gives developers the tools to make flexible interfaces using container and row with col classes.
Component Integration: Bootstrap framework delivers users with various pre-built components which include navigation elements alongside buttons as well as cards that can be inserted directly into pages. Developers should base their work on these components to personalize them according to required specifications.
Typography and Colors: The document requires users to integrate Bootstrap typography and color classes in order to apply designated fonts and colors. Users can create new CSS rules to transform default style elements. Figma to Tailwindcss
Responsive Design: The grid system from Bootstrap operates automatically as a responsive design. Apply responsive classes such as col-md-6 together with d-none and d-md-block to determine elements display criteria according to different screen sizes.
JavaScript Plugins: The integration of JavaScript Plugins happens when the Figma design includes components which require JavaScript functionality to work (for example: Modal, Modal or Carousel objects). Figma to Tailwindcss
Testing and Refinement: Timely checks between your coding work and Figma design will help you make visual matching adjustments until accuracy is achieved.
Figma to Bootstrap Structure:
| Figma Property | Example Value | Bootstrap Class | Usage Example |
|---|---|---|---|
| Font Size | 16px | fs-5 | <p class="fs-5">Text</p> |
| Font Weight | Bold | fw-bold | <h1 class="fw-bold">Heading</h1> |
| Text Color | #0d6efd (Primary Blue) | text-primary | <span class="text-primary">Text</span> |
| Background Color | Light Gray (#f8f9fa) | bg-light | <div class="bg-light">Box</div> |
| Padding | 16px (all sides) | p-3 | <div class="p-3">Padding</div> |
| Padding Horizontal | 24px | px-4 | <div class="px-4">Horizontal padding</div> |
| Margin Bottom | 32px | mb-4 | <div class="mb-4">Spacing below</div> |
| Border Radius | 8px | rounded | <img class="rounded" src="..." /> |
| Box Shadow | Default Shadow | shadow | <div class="shadow">Card</div> |
| Width (Responsive) | 100% / Auto | w-100, w-auto | <div class="w-100">Full width</div> |
| Text Alignment | Center | text-center | <p class="text-center">Centered Text</p> |
| Layout – Flexbox | Horizontal row | d-flex flex-row | <div class="d-flex flex-row">Row</div> |
| Layout – Column | Vertical stack | d-flex flex-column | <div class="d-flex flex-column">Column</div> |
| Grid Layout | 2 Equal Columns | row, col-6 | <div class="row"><div class="col-6">A</div><div class="col-6">B</div></div> |
| Button Style | Primary Button | btn btn-primary | <button class="btn btn-primary">Click Me</button> |
| Image Responsive | Auto resize | img-fluid | <img class="img-fluid" src="..." /> |
| Responsive Breakpoints | md, lg, xl | col-md-6, d-lg-block | <div class="col-md-6 d-lg-block">Visible on large</div> |
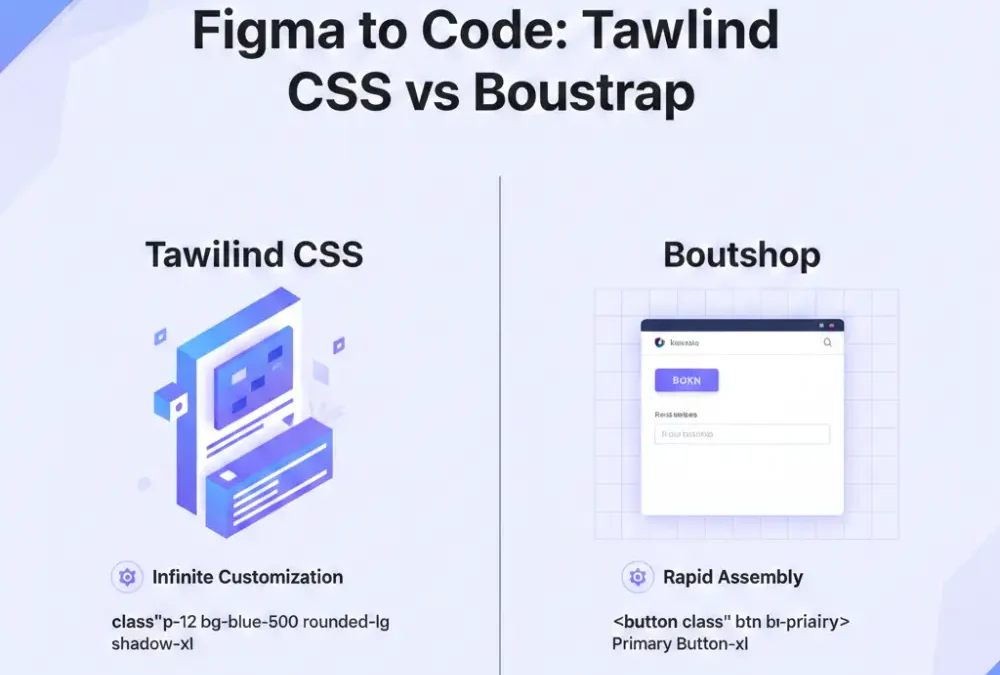
Tailwind CSS vs. Bootstrap: The Comparison
| Feature | Tailwind CSS | Bootstrap |
| Philosophy | Utility-First: You create custom components, built by small classes. | Component-Based: You are working with pre-made components (navbars, buttons). |
| Figma Accuracy | High: Is able to match objects pixel-perfectly, with ease, and custom Figma designs. | Moderate: Ideally, when you are using standard UI kits in your Figma design. |
| Learning Curve | Steeper; needs knowledge about CSS properties. | Simpler; simple to learn and start. |
| File Size | Small Only ships the CSS you actually use (via JIT/Purge). | Large: Wills all a library of styles, although unused. |
| Customization | Infinite: It all is managed through a config file. | Limited: Typically will need default Sass variables to be superseded. |
3) General Tips for Conversion:
Here are some essential recommendations which apply equally to both Figma-to-Tailwindcss and Figma-to-Bootstrap conversion processes:
Consistency: The design conversion process should maintain coherence throughout by making sure the Figma and coded design match perfectly in their spacing systems along with typography rules and color schemes and every component style.
Performance: The optimization of your code for performance includes minimizing both CSS and JavaScript file content while you optimize all images and other accessible assets. Figma to Tailwindcss
Browser Compatibility: The examination of your website within different web browsers helps detect compatibility issues so you can apply required fixes.
Accessibility: The implementation of accessibility best practices should happen through the use of appropriate HTML semantics along with images’ alt attributes and keyboard navigable elements. Figma to Tailwindcss
Version Control: Organizations should use version control tools such as GitHub to track project changes while working together.
Documentation: You should document your code through proper documentation methods whenever other people join in the project development. Justify your HTML and CSS code through comments that illustrate your selection process along with variations from the Figma design.
Test the responsiveness: Monitor the responsive design by testing your creation across multiple screen sizes and mobile devices to verify visual appearance and functionality. Figma to Tailwindcss
Conclusion:
Web development requires a crucial process of converting Figma to Tailwindcss Bootstrap. Your selection between Tailwindcss and Bootstrap will be based on project needs together with your individual developer preferences. The success of conversion depends on paying attention to details together with maintaining consistency while conducting exhaustive testing independent of the selected framework. Your ability to maintain Figma design integrity alongside best practice methods will lead to web applications and websites that match initial goals and requirements.
FAQ: Tailwind CSS vs Bootstrap
What is the main difference between Tailwind CSS and Bootstrap?
Tailwind CSS is a utility-first css framework in which you create your design with tiny, reusable utility classes. Bootstrap is a component structured framework that is shipped with pre-made UI components such as buttons, navbars, and modals.
Which is better for custom design Tailwind or Bootstrap?
Tailwind is preferable when you want custom designs since it enables you to control every style. Bootstrap is less dynamic, more opinionated and in most cases deep customization usually needs to be overridden.
Do Tailwind and Bootstrap require JavaScript?
JavaScript is not provided in Tailwind CSS directly. It may be combined with any JS library. Bootstrap has compiled JavaScript in it or uses jQuery in their elements such as modals, drop downs and carousels.
Which is more beginner-friendly?
Bootstrap is simpler to the beginner who needs rapid UI components with minimal usage of CSS. The learning curve of Tailwind is more as compared to providing better long-term control and scalability.
Can I use both Tailwind and Bootstrap in the same project?
Sure, technically but not wise. They adhere to various philosophies and this may be in conflict. There is less readability in mixing them, so it is best to stay with either.
Which is better for performance and load time?
Tailwind and PurgeCSS are also capable of creating smaller CSS files because unused styles are removed. By default, Bootstrap provides larger base CSS file, which can give additional weight.
How do Tailwind and Bootstrap handle responsive design?
Both structures favor the responsive design. Tailwind employs a mobile-first break point in class names (e.g. md:flex), whereas bootstrap pre-defines a grid classes, such as col-md-6.
Is it easier to maintain Tailwind or Bootstrap code?
Tailwind even encourages reusable parts through utility classes, and this can become more manageable especially with large projects. You may make Bootstrap more difficult to maintain when you often modify its default styles.
Should I switch from Bootstrap to Tailwind CSS?
Whereas Tailwind is a convenient option when you need to have more flexibility and freedom of design of particular elements of CSS as well as want to make it a bit smaller. But when you are already working on bootstrap and you need quick delivery and default UI elements then Bootstrap is still okay.